Drying and Reviving
Once you have a mature sourdough starter, you will have to keep maintaining the starter to keep the culture of bacteria and yeast healthy and alive. It is like a pet that you will have to feed. At times, when you like to take a timeout from baking, drying your starter is the way to go. In this post, we are going to discuss how to dry and revive a starter.
Why do we need to make a dry sourdough starter?
It is the best method for storing it long term, and also a good backup in case something really goes wrong with your starter.
Let’s get started!
Drying the Starter
List of tools you will need to dry a sourdough starter:
- Silicone Baking Mat / Parchment Paper
- Baking tray
- Offset Spatula / Bowl Scraper
- Glass Jar
- Digital Weighing Scale
Step 1: Feed your starter
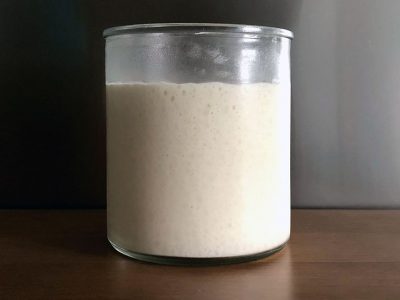
Start by feeding your starter as if you are to bake with it. For this recipe, I had fed 40g starter with 40g water and 40g flour and used it at peak.
Step 2: Spread the starter out to dry
Line the baking tray with a silicone baking mat or parchment paper.
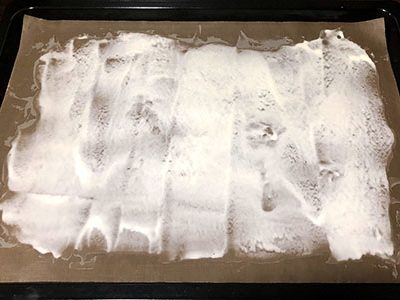
When the starter reaches its peak, it is time to spread it out to a thin even layer to dry using an offset spatula/bowl scraper.
Place the baking tray in a cool, dry place and leave it till it dries. This might take from 1- 2 days.
Step 3: Wait till completely dry
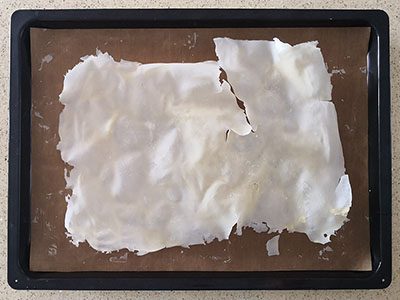
A completely dry starter will peel easily from the silicone baking mat, brittle and crispy. Use your hands to break it into smaller pieces so that it can fit into an airtight glass jar. Using a weighing scale, weigh the starter. It should be approximately half the amount that you started with, in this case, 60g.
Step 4: Store in an airtight container
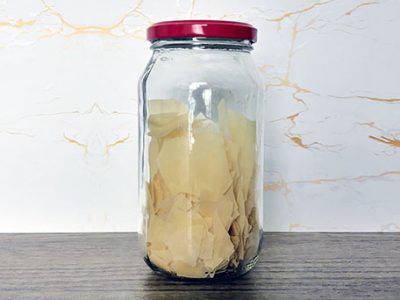
Transfer the starter flakes into an airtight container. Store the starter flakes in a dry, cool and dark place, preferably.
Tip: Do not store it in a hot place, fridge or freezer!
Reviving the Starter Flakes
Reviving a starter involves hydrating the starter flakes that was earlier dried for storage. Once you are ready to revive the starter, gather the tools needed to carry out the task.
List of tools needed for reviving the starter are as follows:
- Mixing bowl / Glass jar / Glass measuring cup
- Spatula
- Digital Weighing Scale
Day 1: Rehydrate the starter flakes
Mix 10g starter flakes with 20g water and try to submerge the flakes. Over the next 3-4 hours, occasionally stir the flakes so that the starter dissolves into the water.
Once the starter has turned into a liquid mixture, it is time to add back 10g flour to the mixture and leave it for 24 hours at room temperature. If using a small mixing bowl, transfer the starter back to a glass jar.
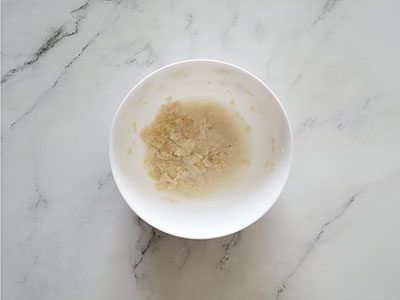
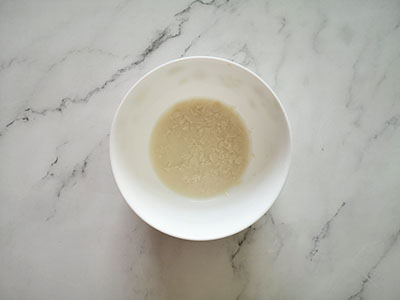
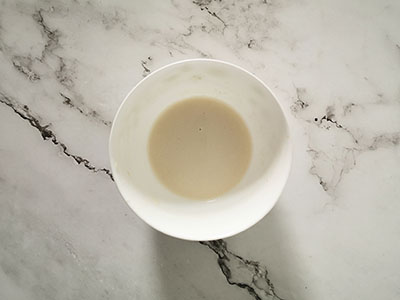
Day 2: Wait till the starter looks bubbly before feeding
On the next day, take a look at the starter. If there are none or just a few tiny bubbles, leave it for another 6-12 hours. Once the starter looks alive and bubbly, do not discard but proceed to feed 10g water and 10g flour to the mixture and leave it for 12 hours. At the end of 12 hours, you should be able to see lots of small bubbles and the starter may have risen and fallen a little.
Repeat again the same step by proceeding to feed the starter with 10g water and 10g flour. Observe the starter after 6-12 hours for even more small bubbles and the starter may have risen and fallen more then previous feeding.
Day 3: Monitor, discard and feed again and again
On Day 3, when the starter has shown signs of rising and falling, it is time to move on to the next step. Like how you would normally feed your regular starter, discard all of the starter except for 30g starter and feed with 30g water and 30g flour (using 1:1:1 ratio).
Observe how long it takes the starter to peak and fall before feeding it again. Once the starter is able to triple in size within 4 hours at 27-29°C, your starter is now alive and healthy.
Day 4 onwards: Time to bake
In order to prepare your levain for baking, discard all of the starter except for 30g starter and feed 30g water and 30g flour (using 1:1:1 ratio). Once the levain has peaked, the starter is now ready for baking!
Tip: Remember to save some starter for another day!
Frequently Asked Questions
Yes you can, but it will take more feedings to bring it back to life and get it ready for baking.
Sourdough starter can be dried in the kitchen area at room temperature (26-29°C). If your environment is cooler then 21°C, you can place it in the oven with the light on, above the fridge or use a food dehydrator to help it along.
Indefinitely.
The same flour you use to feed it.
Firstly, check that your flour is of good quality and fresh (bought and stored less then 6 months).
Secondly, ensure that your starter is kept in a warm area between 26-29°C.
Finally, ensure that you time your feedings to that you to not overfeed your starter, meaning to feed only after your starter has peaked and fallen.
