Learn how to feed, maintain and save a backup starter
Why do you need to feed the sourdough starter?
Once you have made a starter, you will need to feed the starter “food” to keep it healthy and active. Feeding means mixing the starter with fresh flour and water. The wild yeast and bacteria in the starter uses the flour to continue multiplying, enabling the dough rise and create complex flavours.
Life Cycle of a Sourdough Starter
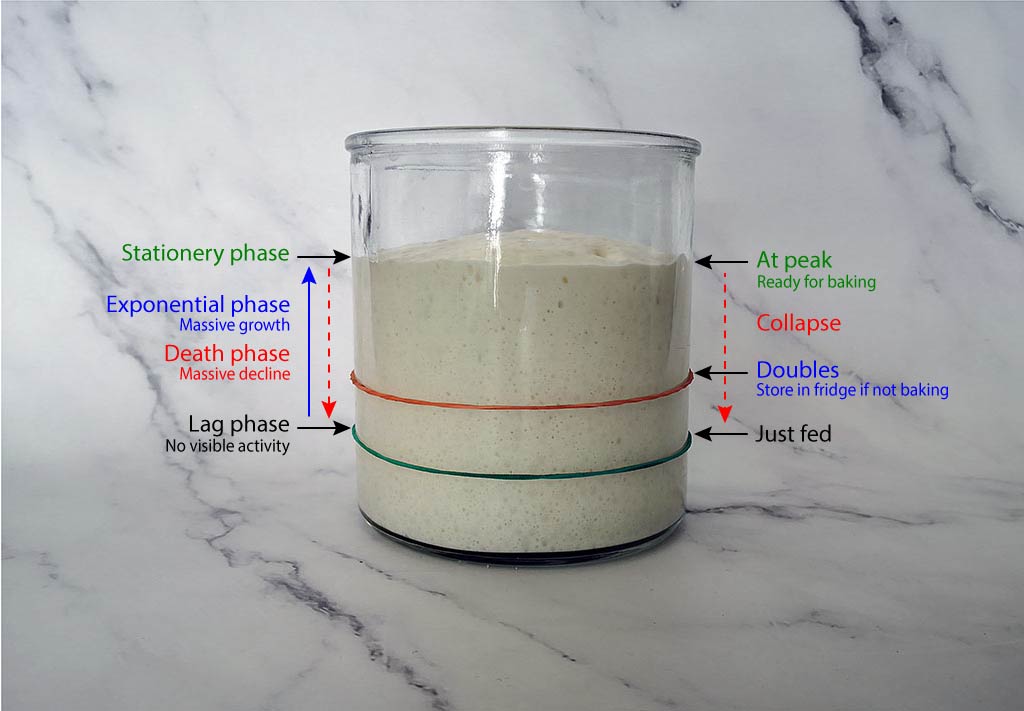
An established (mature) starter will go through a predictable cycle of no activity to rising, peaking and collapsing. The lifecycle of a sourdough starter is divided mainly into four phases.
Lag phase – Starting point, normally when the starter has just been fed and the bacteria is getting ready to multiply.
Exponential phase – This is when the bacteria starts to multiply quickly, causing the starter to rise and be bubbly.
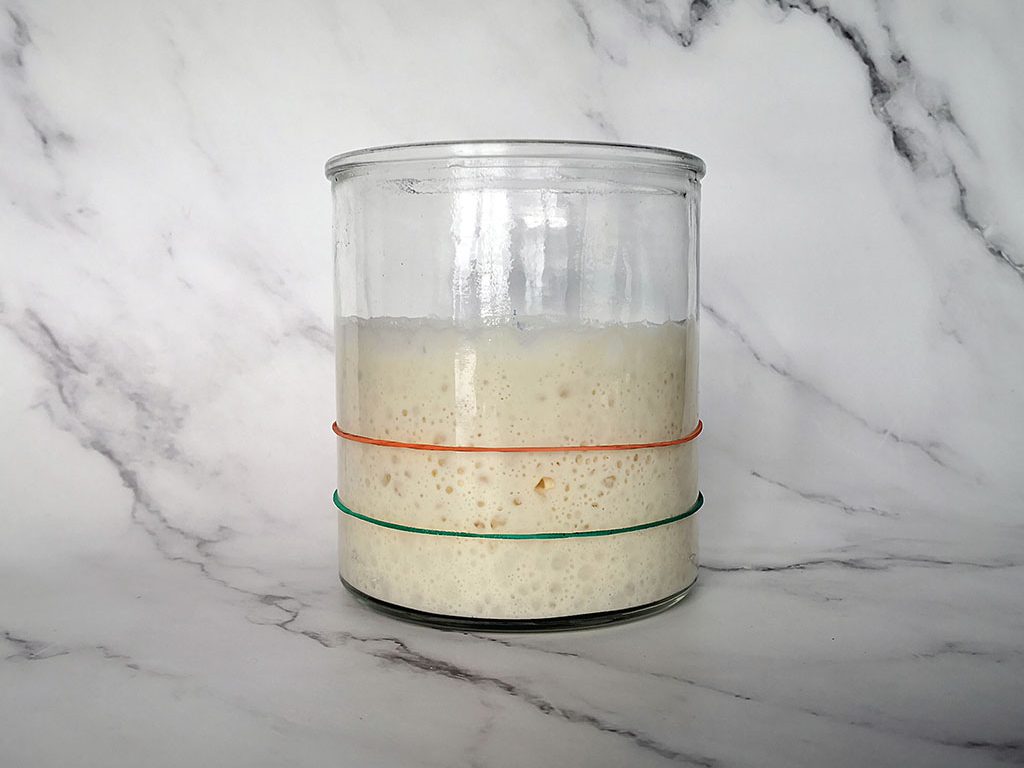
Stationery phase – This phase is when starter reaches it’s peak, the dome like structure at the top starts to flatten out the starter starts to run out food. Starter will have lots of visible small and big bubbles; and have increased in volume at least 3-4 times from when it started.
Death phase – At this point, food is decreasing and the starter will start to collapse as some of the bacteria starts dying off and the rest becomes dormant. You can easily see some remnants at the side of the glass jar.
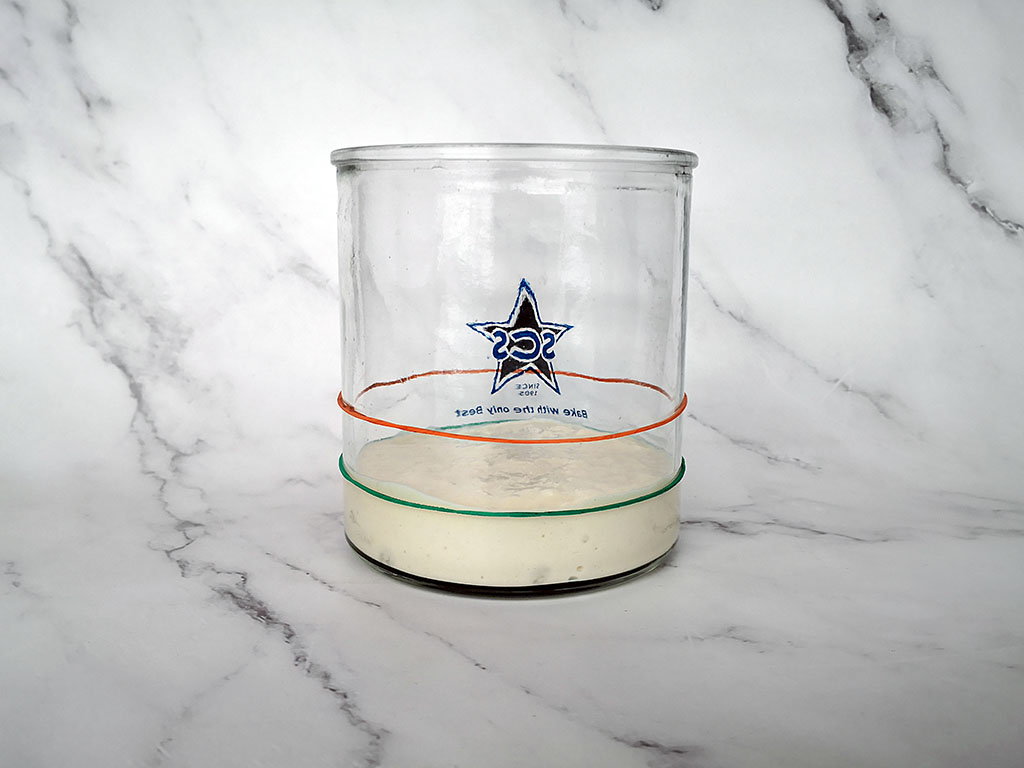
Lag phase - Newly fed starter, no visible activity
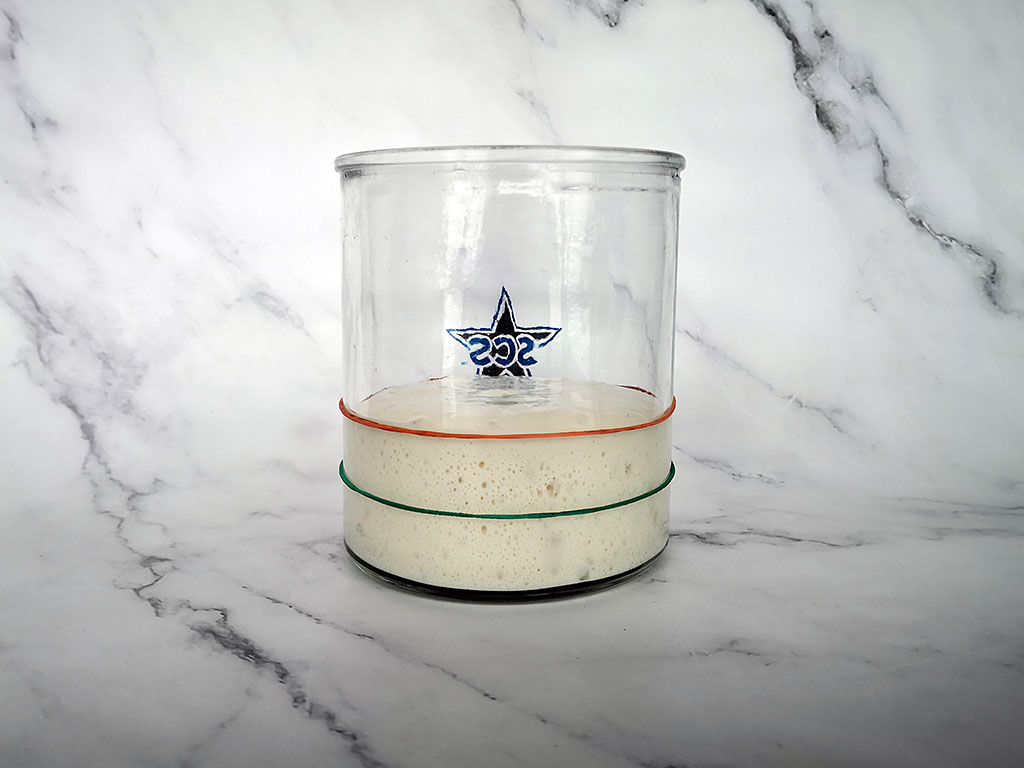
Exponential phase - 2x volume with some visible bubbles
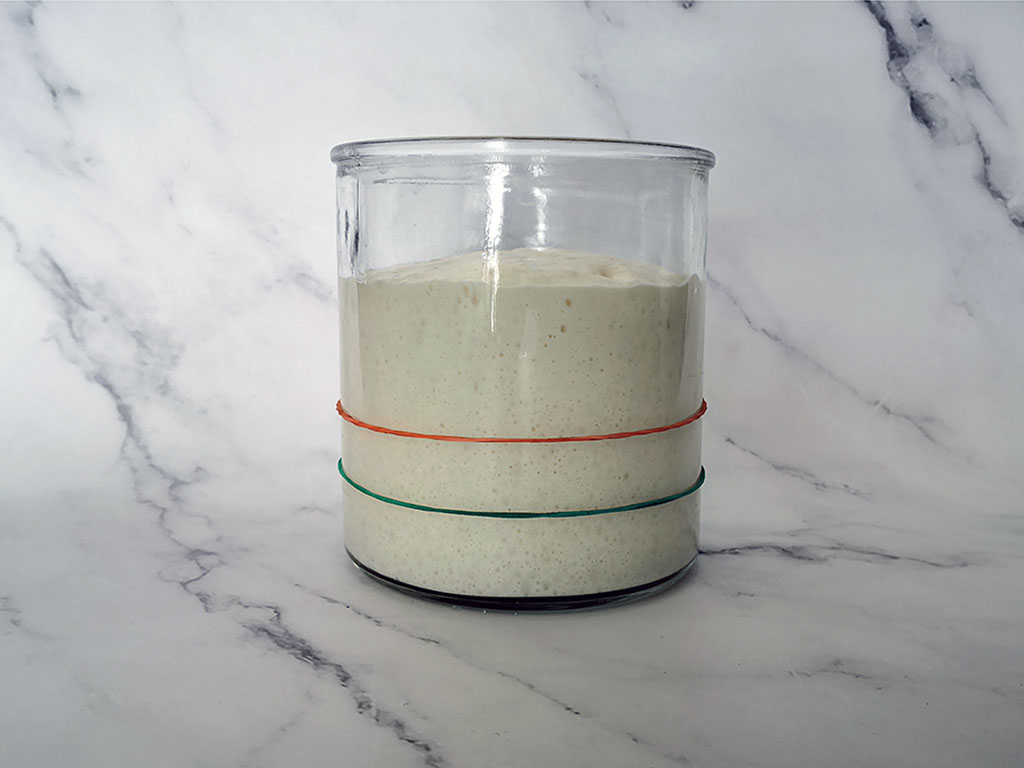
Stationery Phase - 4x volume (at peak) with small and big bubbles
Death Phase - Collapsing, able to see remnants at the sides of the jar
Feeding the sourdough starter
There are many ways to feed, also called refresh and maintain a sourdough starter. It might get confusing with so many options out there but let me outline for you what options are available. Then, you can decide what is suitable depending on how often you want to bake.
Option 1: Use the starter for baking
If you are going to use the starter for baking, you will have to determine how much starter is needed. For example, using my simple sourdough bread recipe, I will need about 60g of starter. Using a 1:1:1 ratio, I will discard all but 30g of starter, and add 30g of bread flour and 30g water. Then, give everything a good mix before covering loosely with a lid. Once it reaches its peak, in about 4-5 hours at room temperature of 26-28°C (78-82°F), it is ready to be used. Remove 60g portion of the starter and keep the remaining starter for another day. If you are not sure how a starter looks like at peak, refer to the photo above.
Tip: Make someEXTRAstarter as some may stick to the sides of the jar!
Option 2: Baking daily or up to 3-4 days once
If you are baking daily, you can either have the option to keep your starter at room temperature or in the fridge. If storing at room temperature, a higher ratio is recommended, depending on your current room temperature. You can start with a 1:5:5 ratio (5g starter, 25g water and 25g flour), wait till the starter peaks and collapses before feeding again. Alternatively, you can just store your leftover starter from previous bake and keep it in the fridge and refresh it before the next bake.
Option 3: If you don’t bake often (Weekly)
Sourdough starters are resilient. If you only bake on a weekly basis, it is better to store it in the fridge. The cold temperature slows down the fermentation of the wild yeast and bacteria, to a point where becomes dormant till it is awaken to be used again.
For this option, feed the starter with 1:2:2 ratio (10g starter, 20g water and 20g flour), let it rise 1-2 hours at room temperature before storing it in the fridge to be refreshed on a weekly basis. Write the date the starter has been refresh so you can remember. Don’t fret if you miss out a day or two. Some starters have gone unfed for over a week or even months without going bad. You may see a layer of hooch, looks like a dark watery liquid on the surface of the starter if you haven’t fed it in awhile. This is normal, just shows that the starter is hungry. You can either pour off the liquid or stir it back in before you refresh the starter.
Maintaining the sourdough starter
As with all beginners (even me), I used to fuss about keeping it at room temperature and feeding it twice daily and stuck to a strict schedule. However, as time passed, I relaxed my approach as I don’t bake every single day, I decided to just keep it in the fridge, took out what I needed to bake and feed it at least once a week to keep it healthy and alive.
There may be times whereby you will have to put your sourdough starter on hold for long periods of time. So what do you do? Leave it in the fridge? Freeze some? Nope.
The best way to preserve your starter for the long term is to dry it. The process is pretty simple actually, just feed it as if you would bake with it, spread it out to dry as thinly as possible. When the starter is completely dried out, it will be brittle. Then, it’s time to break it into small pieces and store it in an airtight container.