The process in simple terms: Mix equal amounts of flour and water, and leaving it to ferment. After a certain amount of time, discard a portion of the starter and feed it with fresh flour and water. Repeat this process and over time the beneficial bacteria and wild yeast will start to multiply, visible through their bubbles, rising and and falling consistently.
Want to know the “SECRET” to making a sourdough starter?
Lots of PATIENCE!
Yes indeed. It’s really more of a waiting game actually. Most of the work is done by the bacteria and wild yeast. All you need to do is to encourage it’s growth by giving it food and water.
In order to make a sourdough starter, you will first need some ”Flour” and “Water”.
Flour
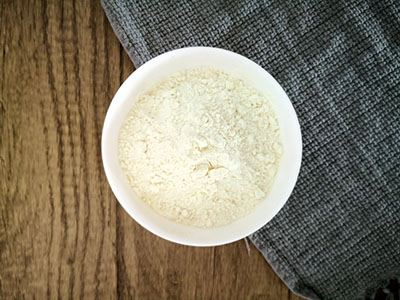
I would recommend using wholegrain flour (rye flour or wholemeal flour) for the first two days before switching to unbleached high protein flour (aka bread flour) on the third day. Reason being is that the wild yeast is more likely to be found in wholegrain flour compared to bread flour or all purpose flour. However, from the third day onwards, bread flour does a better job at cultivating the starter without adding too many competing organisms found in wholegrain flour.
Water
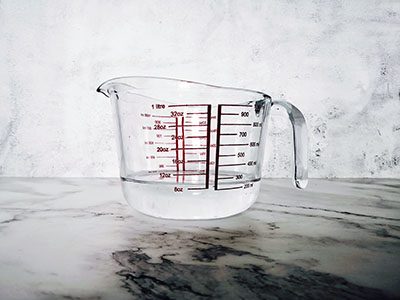
The most accessible water is chlorine free tap water. To remove the chlorine, either boil the water or leave the cup of water out for a few hours for the chlorine to evaporate.
However, if the tap water in your area has chloramine, a chemical smell and is not clean, the better option is to use water with minerals in it, like spring water and filtered drinking water but NOT distilled water.
How long does it take to make a starter?
It depends, it would take as fast as seven days before you can use it to make bread but to reach mature stage it took about two weeks for me. There is no definite answers on how long it will take as no two cultures are the same as we are dealing with wild yeasts and bacteria. The conditions in my kitchen may be different from yours.
What is important to note is to be patient, follow the basic guidelines below, use your sensory cues to see and smell the starter. Wait for signs of activity like bubbles, increase in volume before you continue feeding the starter.
Sourdough Starter Tools
Some of the tools that you will need to start making a sourdough starter are listed below:
- Digital Weighing Scale
- Glass Jar with cover
- Silicone Spatula
- Small Mixing Bowl (Optional)
- Rubber band or marker pen
Please visit “Sourdough Starter Tools” for more details.
How to make a sourdough starter?
The process starts with mixing equal amounts of flour and water (100% hydration) together and leaving it to ferment. The mixture will look like a thick mass, like cooked oat porridge. The new starter needs to be refreshed (aka fed) daily for the first two days and twice daily from Day 3 onwards to give it some “food” i.e. flour to eat.
Daily Refreshment Process
1. Place a clean glass jar or small mixing bowl on a digital weighing scale. Check that the digital weighing scale has been tared to “zero” before adding any flour.
2. Using a spatula, stir the starter before scooping it out of the glass jar into the clean glass jar or small mixing bowl.
3. Then, add the required amount of flour and water. Mix well until no dry lumps remains. After that, scrape down the sides of the glass jar to ensure that no starter is left at the side of the glass jar to feed mold.
4. Cover loosely with a lid and mark the beginning level of jar with a rubber band or whiteboard marker.
DAY 1: Make the starter (Every 24 hours)
Day 1, 9am – Mix 10g wholegrain flour and 10g of water and leave it to ferment for 24 hours. Ensure that there are no bits or lumps of flour remaining. A starter that has just been refreshed will resemble a thick and gooey paste.
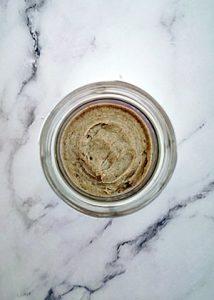
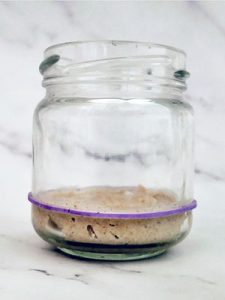
DAY 2: Monitor, Discard and Feed (Every 24 hours)
After 24 hours, monitor the progress of the starter, look for signs of activity like tiny bubbles, volume growth and take note of what the starter smells like. Discard all but 10g starter and feed it with 10g unbleached high protein flour and 10g of water and transfer to a clean jar. Do take note from this point onwards that the starter will be refreshed at a 1:1:1 ratio, which means equal amount of 10g starter, 10g water and 10g flour.
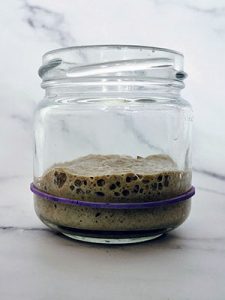
Day 2, 9am – Starter is showing signs of activity like some tiny bubbles and about 50% growth in volume. The starter smells acidic, like stinky socks. Don’t worry if you do not see any activity. Feed the starter with fresh flour and water.
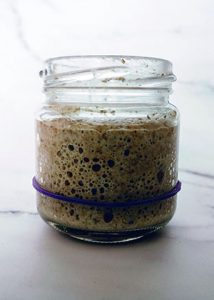
Day 2, 3pm – 6 hours later, the starter has peaked and 3.5x in volume, showing many bubbles. It collapsed 3 hours later to 3x volume. The starter smells really bad.
DAY 3: Monitor, Discard and Feed (Every 12 hours)
After 12 hours, monitor the progress of the starter, look for signs of activity like tiny bubbles and take note of what the starter smells like. Discard all but 10g starter and feed it with 10g unbleached high protein flour and 10g of water and leave for 12 hours. Only refresh the starter only when the starter is “hungry”. Signs of hunger include a starter that has peaked and collapsed, looks watery and smells acidic.
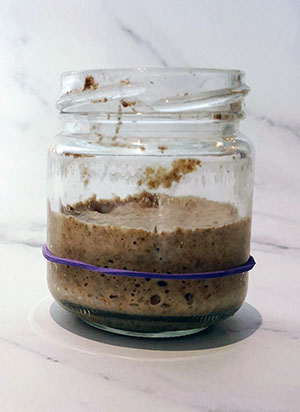
Day 3, 9am – 1st feeding: The starter has fallen to double the volume with some tiny bubbles remaining. It smells acidic and really bad. Refresh the starter by discarding some starter and feed it with fresh flour and water.
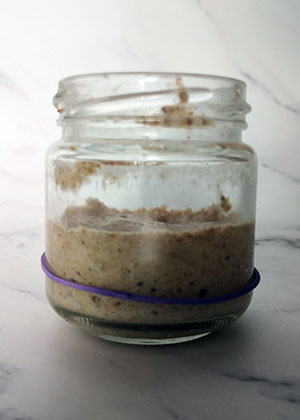
Day 3, 9pm – 2nd feeding: The starter has peaked at about triple the volume before collapsing. Smells like alcohol. Refresh the starter by discarding some starter and feed it with fresh flour and water.
DAY 4: Monitor, Discard and Feed (Every 12 hours)
After 12 hours, monitor the progress of the starter, look for signs of activity like tiny bubbles, note down what the starter smells like. Hopefully by Day 4, as the yeast begins to develop, you will be able to see bubbles with some rise. When the starter falls, it’s time to feed again.
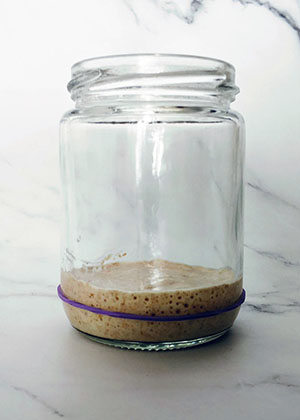
Day 4, 9am – The starter has doubled in volume with some tiny bubbles remaining. It smells like alcohol. No refreshment as the starter did not look watery or show any signs of collapsing yet.
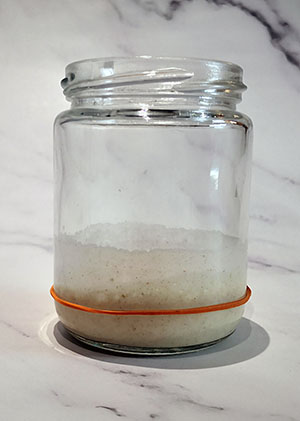
Day 4, 9pm – 1st feeding: Starter has collapsed to 1.5x volume. Proceed to discard and refresh the starter.
DAY 5: Monitor, Discard and Feed (Every 12 hours)
By the end of Day 5, the starter should be full of finer bubbles on the top and side of the jar, have a sweet grassy smell and also see a significant increase in volume. If the starter only has a few tiny bubbles, without any rising, look for signs of hunger (starter with tiny bubbles, looks runny and smells acidic) before all but 10g starter and add 10g unbleached high protein flour and 10g water. Repeat every 12 hours until the starter is active and full of bubbles.
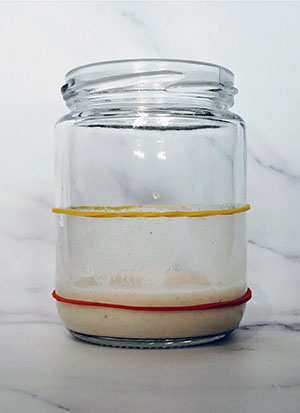
Day 5, 9am – The starter has peaked at about 4x volume in 5 hours after feeding before collapsing. It has a fruity and alcoholic smell. Proceed to discard and refresh the starter.
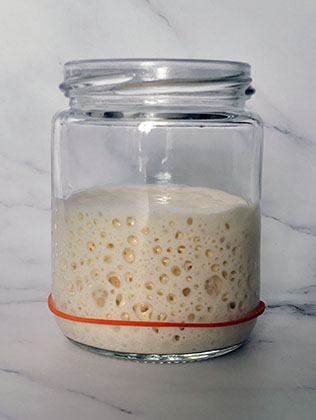
Day 5, 4pm – Starter has peaked at 4.4x volume in 6 hours, with lots of small and big bubbles before collapsing an hours later. It has a fruity and alcoholic smell.
Day 5, 9pm – Proceed to discard and refresh the starter.
DAY 6: Monitor, Discard and Feed (Every 12 hours)
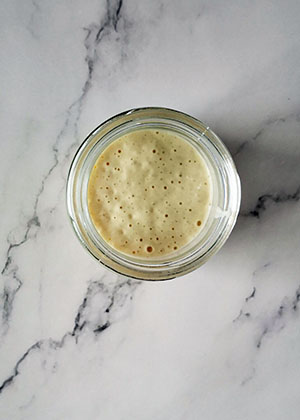
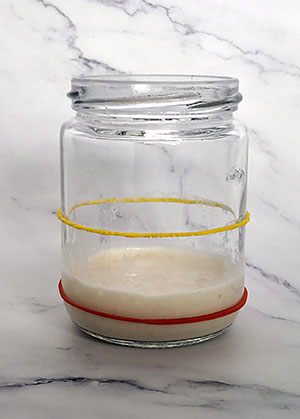
On Day 6, discard all but 10g starter and add 10g unbleached high protein flour and 10g water. The starter should at least double in volume with 4 -6 hours of feeding, reaching its peak before falling. Once the starter has fallen, proceed to refresh the starter. If the starter takes longer then 6 hours to double, continue to refresh the starter after it has peaked and fallen.
DAY 7: Monitor, Discard and Feed (Every 12 hours)
By Day 7, look for signs that the starter is ready for use. Observe when the starter doubles and rises to its peak before falling. A healthy starter should triple or quadruple in volume in a short amount of time. For example if you feed your starter at 1:1:1 ratio at 27°C, it should rise and peak within 4-5 hours before falling. Other signs to look out for are bubbles and web like gluten structure. It should feel light and airy as well. Once the starter has a consistent rise (at least double or more) and falling timing, you can refresh the starter and try baking with it.
If this is not the case, don’t worry continue discarding and feeding your starter with equal amounts of unbleached high protein flour and water (same as Day 6).
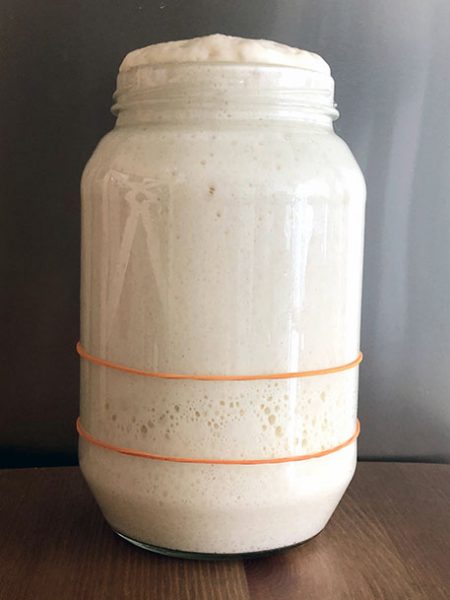
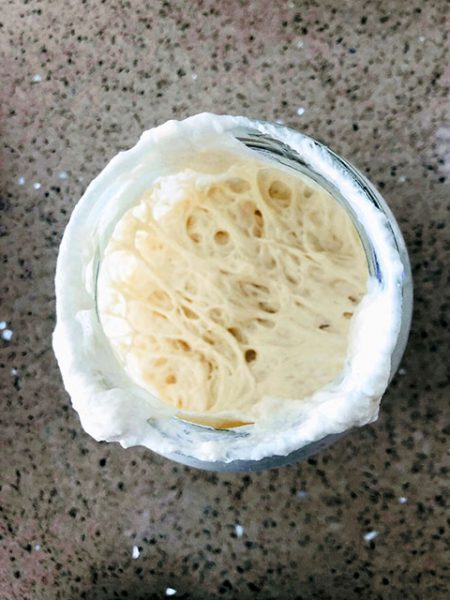
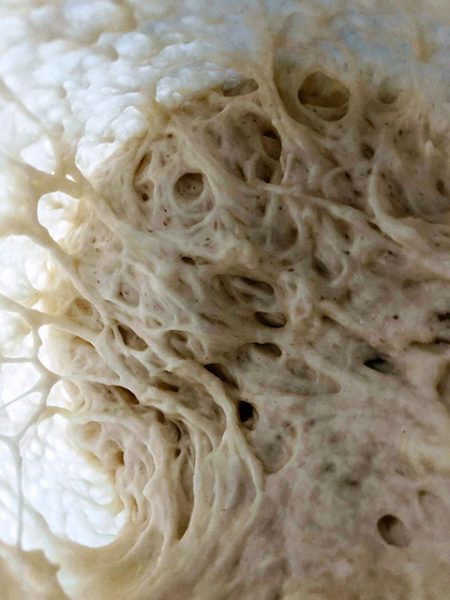
Congratulations! Your starter is now ready for use at peak or keep it in the fridge if you do not plan to use it. Remember to save some starter to be used for the next bake. Please visit “Learn how to Feed, Maintain and Save a backup starter” or “Sourdough Baking” to continue your journey.
Tips For Success
Find a warm spot for your starter, preferably between 26°C to 28°C. If your room temperature is between 21°C to 25°C the starter can still grow but at a slower rate. However, anything below 20°C, it is better to find a warmer place to put your starter like the top of the refrigerator or turning the oven light on.
It is not advisable to keep the starter at 29°C or higher in the early stages of making a starter as it will encourage bad microbes to compete with the Lactic Acid Bacteria and yeast. As a result, you may get not only horrible smelling odours from but also orange and pink mold. Once you get this mold, it is time to throw away the starter and restart the process.
The starter will smell acidic and stinky on the first few days, which in normal. It will normally start to smell fruity or alcohol aroma from Day 3 onwards. Bubbles are a sign activity, starting with a few tiny bubbles from Day 1 and increasing as it starts to mature. Signs of a hungry starter which is ready to be refreshed is watery, and may have a layer of hooch (layer of liquid either on top of middle of starter).
How often should I refresh/feed my starter? On the first 2 days of the starter’s life, you will only need to feed it daily. But from Day 3 onwards, you will need to feed it twice daily at 12 hours intervals. The above is just a general guideline to follow. What is important to note here is to look for signs of activity. You will want your starter to have some bubbles, some rising and falling happening. It will normally take about 12-24 hours for it to happen.
If nothing happens after 36 hours, check the steps above and make sure if you did it correctly. If everything is okay, discard and try again. If after two or three times and get no results, try a different brand of flour or water.
To discard means removing a portion of the starter before you continue feeding the remaining starter.
Why do we need to discard the starter? This is to decrease the volume of the total starter and also give space for the starter to grow. If you do not discard, you will end up with a huge amount of starter. The discard can be used to make other items like pancakes, cakes, pizza.
Please visit Articles or Recipes page to see what what you can do with Sourdough Discard.
